Subscriptions
Applies to roles:
System Administrator System Administrator (NO CRM)About subscriptions
A subscription is a contract in which a person pays a fee for a product or to access a service on a regular basis.
Subscriptions can be created with customised details including pricing, initial charge, currency and billing frequency. A subscription can have one or many discounts applied.
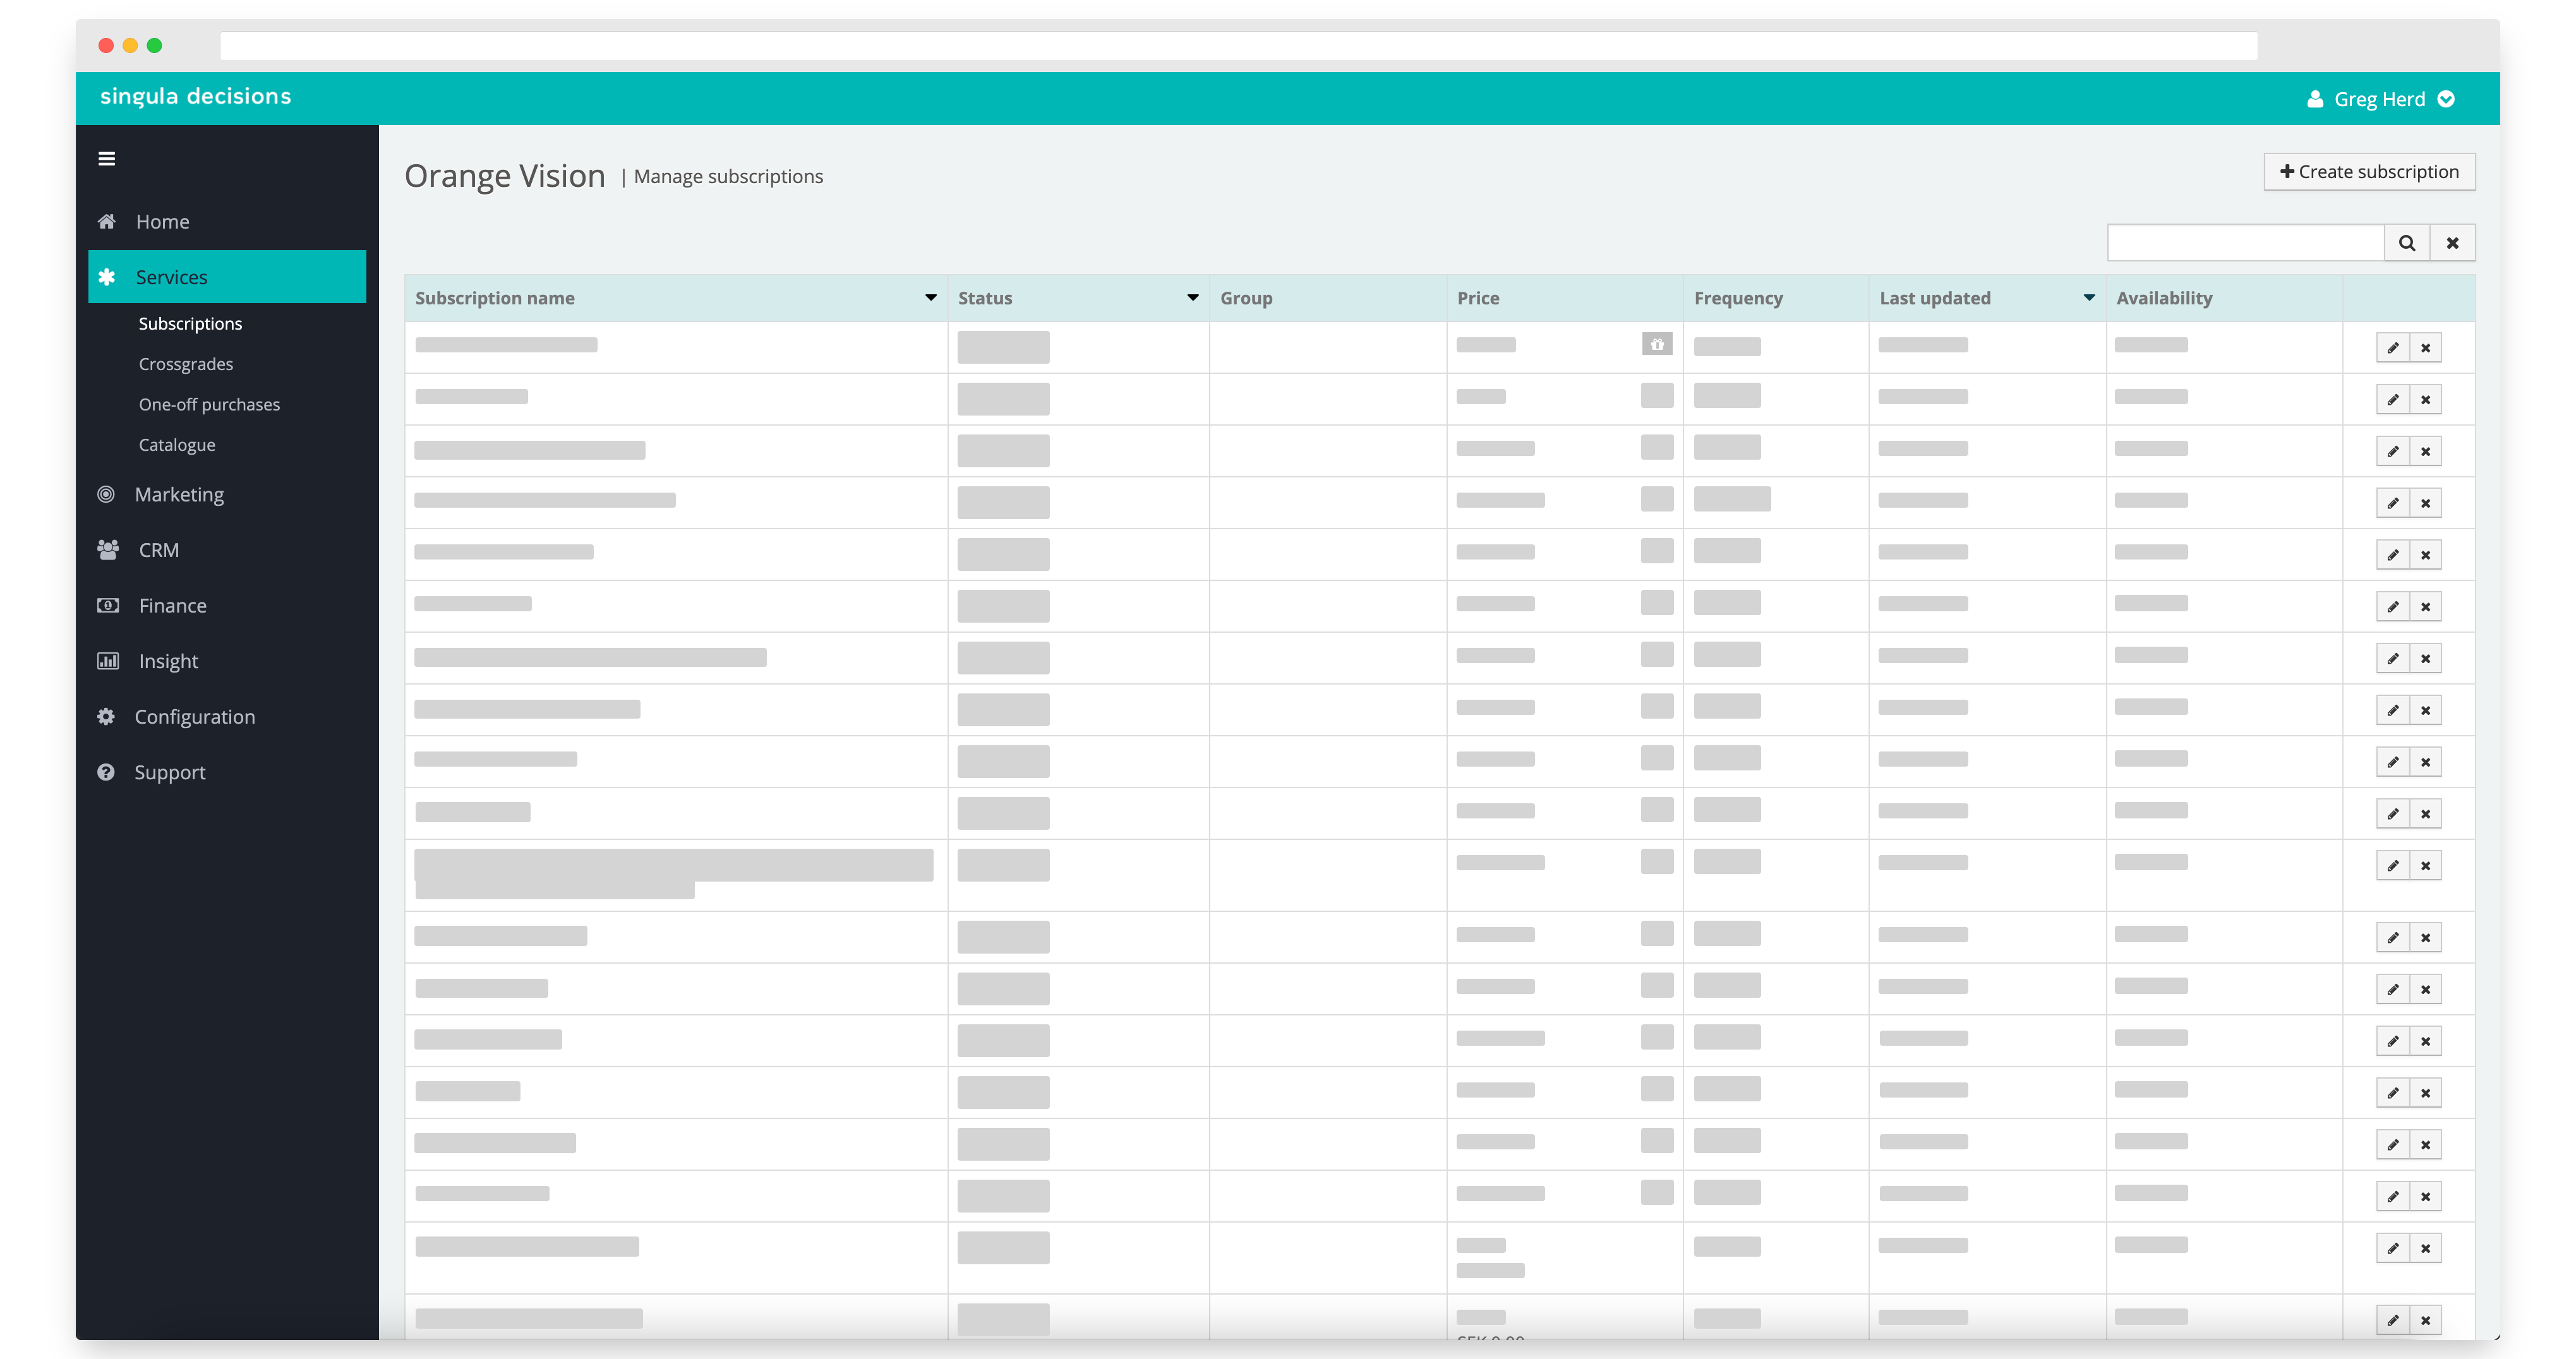
Viewing subscription products
- Select Services
- Select Subscriptions
This list of subscription products contains all active subscription products and historical subscription products.
Create a subscription
- Select Services
- Select Subscriptions
- Select + Create subscription button
Name your subscription
- Enter a subscription name - remember this is the name presented to your customer
- Describe your subscription - this could be used to promote the features of your subscription
- Set the Initial term of your subscription - this is the contract term, for example 3 months or 1 year
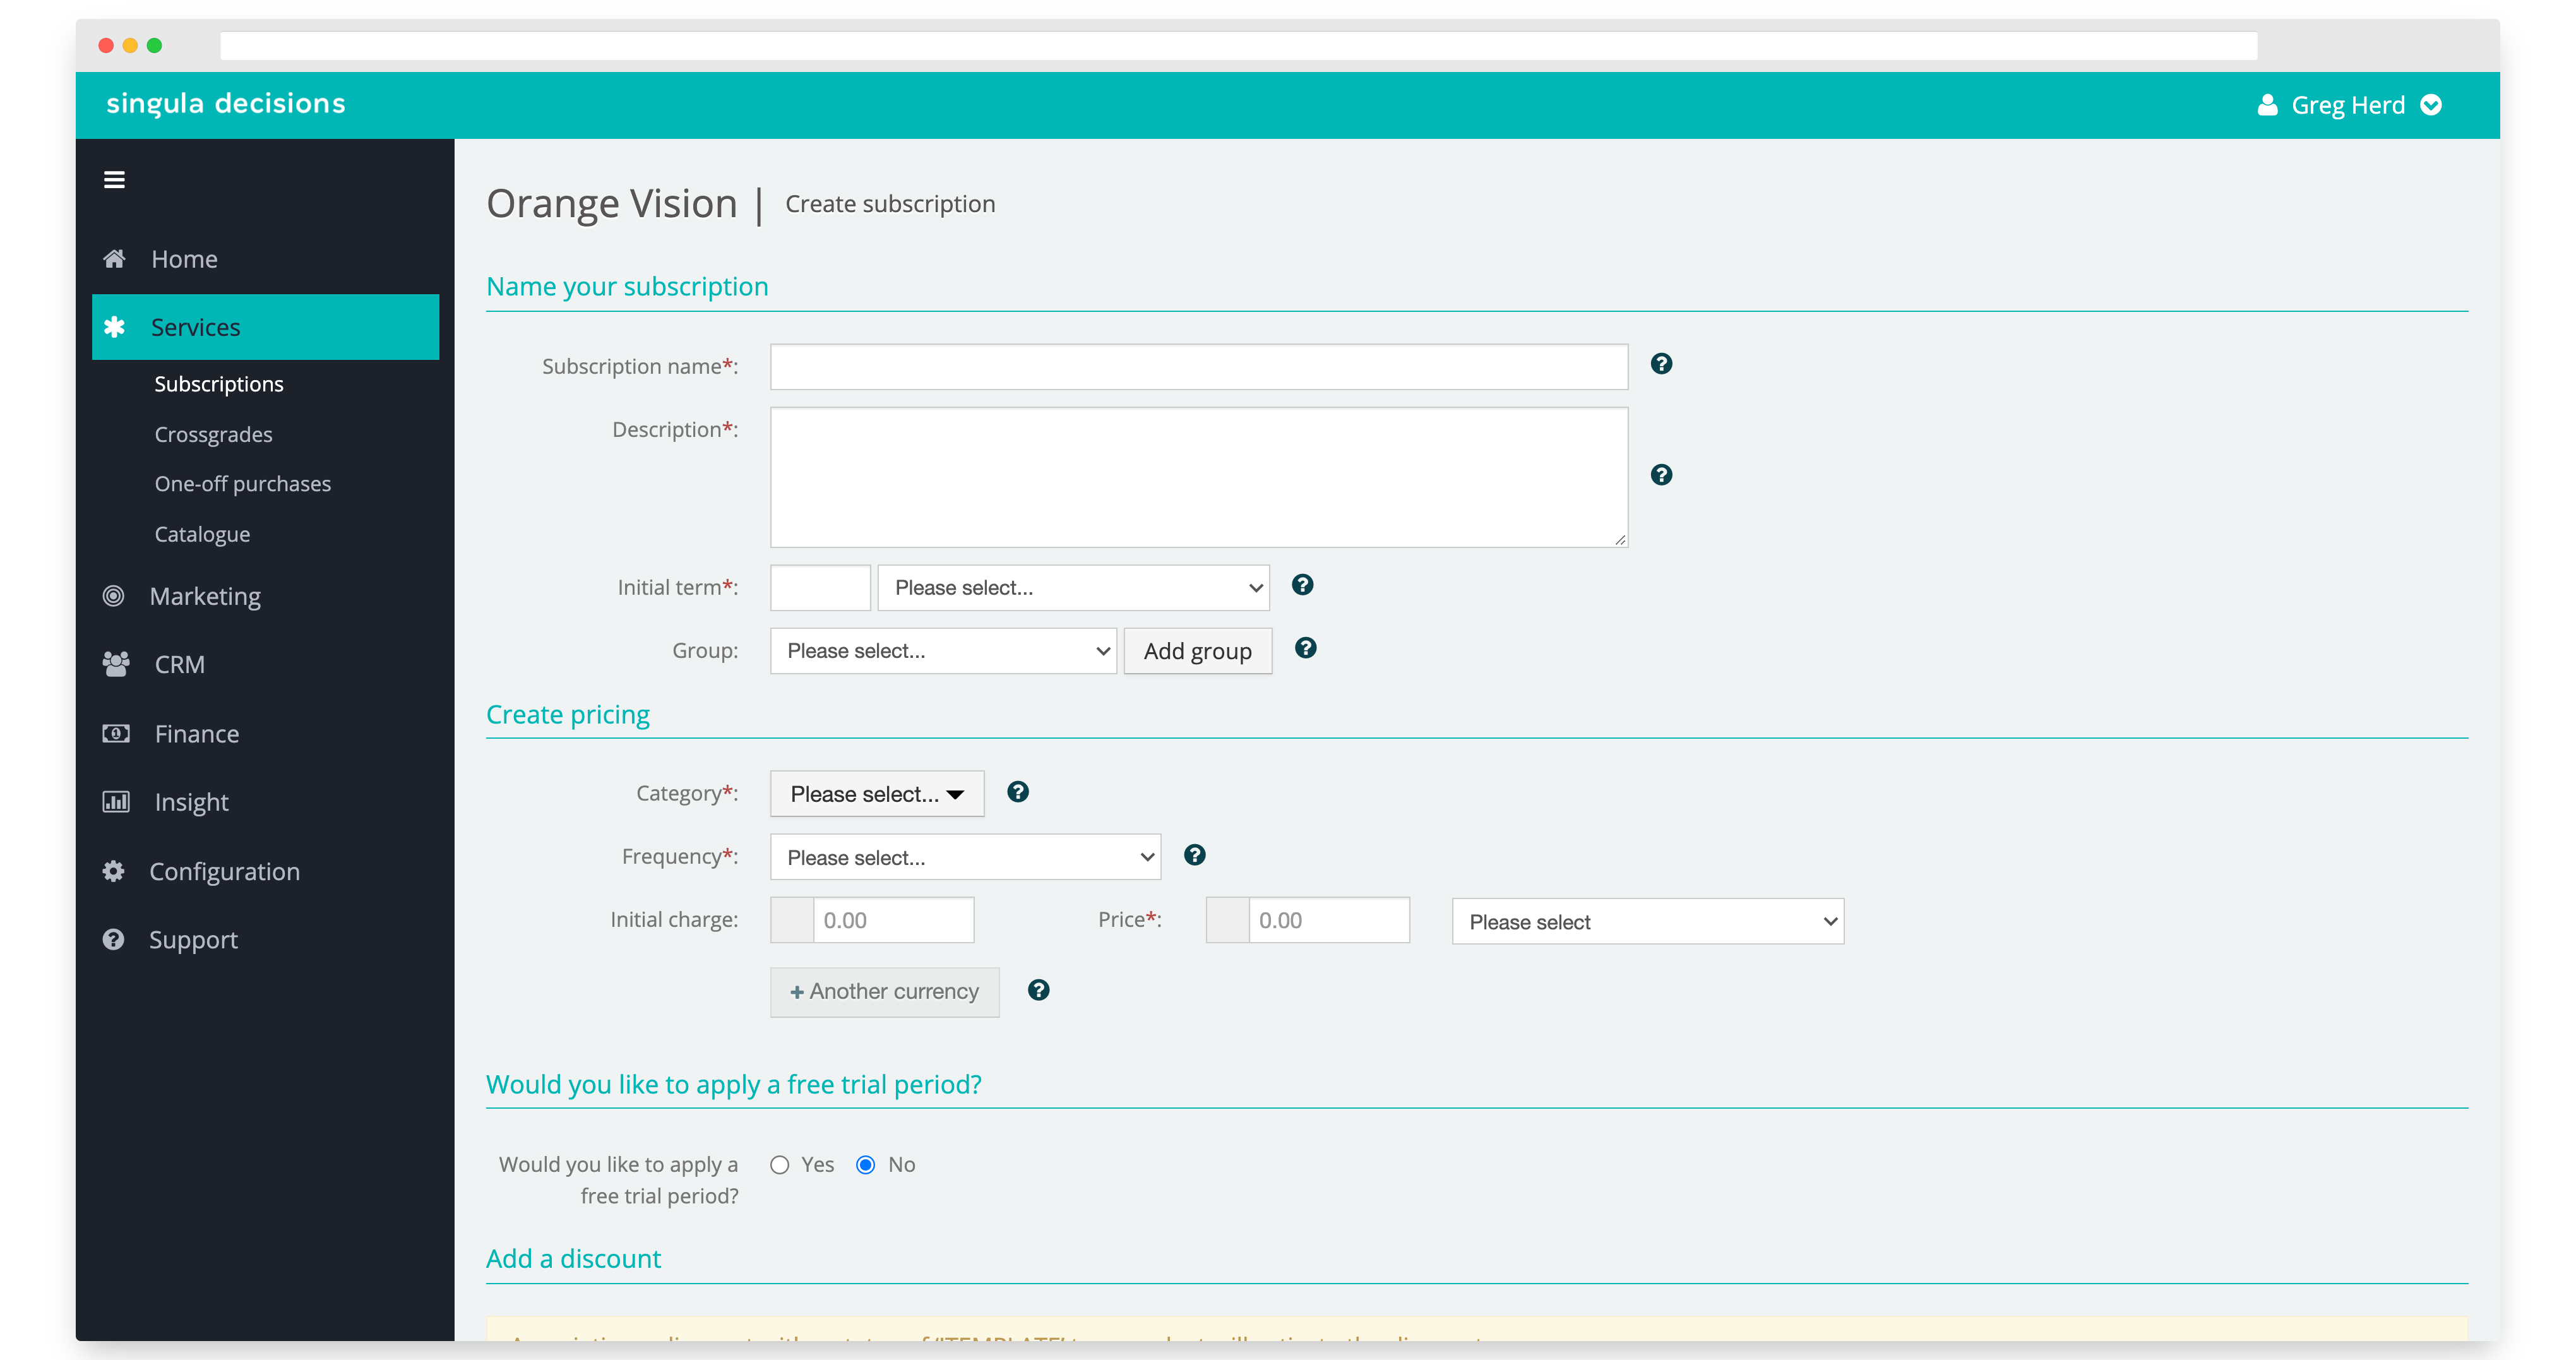
Pricing
- Select a category to add your subscription - this means all your products are organised in a catalogue;
- Select Frequency - this is how often the subscriber will be billed for example every month
- Set an Initial charge - this is where a one-off initial payment is required, for example, to pay for equipment or connection/setup fee
- Enter the subscription Price - this is the amount you will charge the customer for their subscription at each bill.
- Select the currency for that particular price point.
- Select + Another currency to add price points for more currencies (if required)
Adding Free trial - this is optional
- Choose to add a free trial
- Enter the duration of the free trial - this means the customer will be able to use the subscription for the period you have set, without being billed. Once the trial period is over, the billing account will be created and the customer will be billed the price of the subscription less any discount applied at checkout.
Adding a discount - this is optional
- Choose to add a discount
- Choose the discount(s) by typing the discount name or selecting from the list - See Create discounts
- A summary of the selected discount(s) will appear. You can remove a discount by selecting x
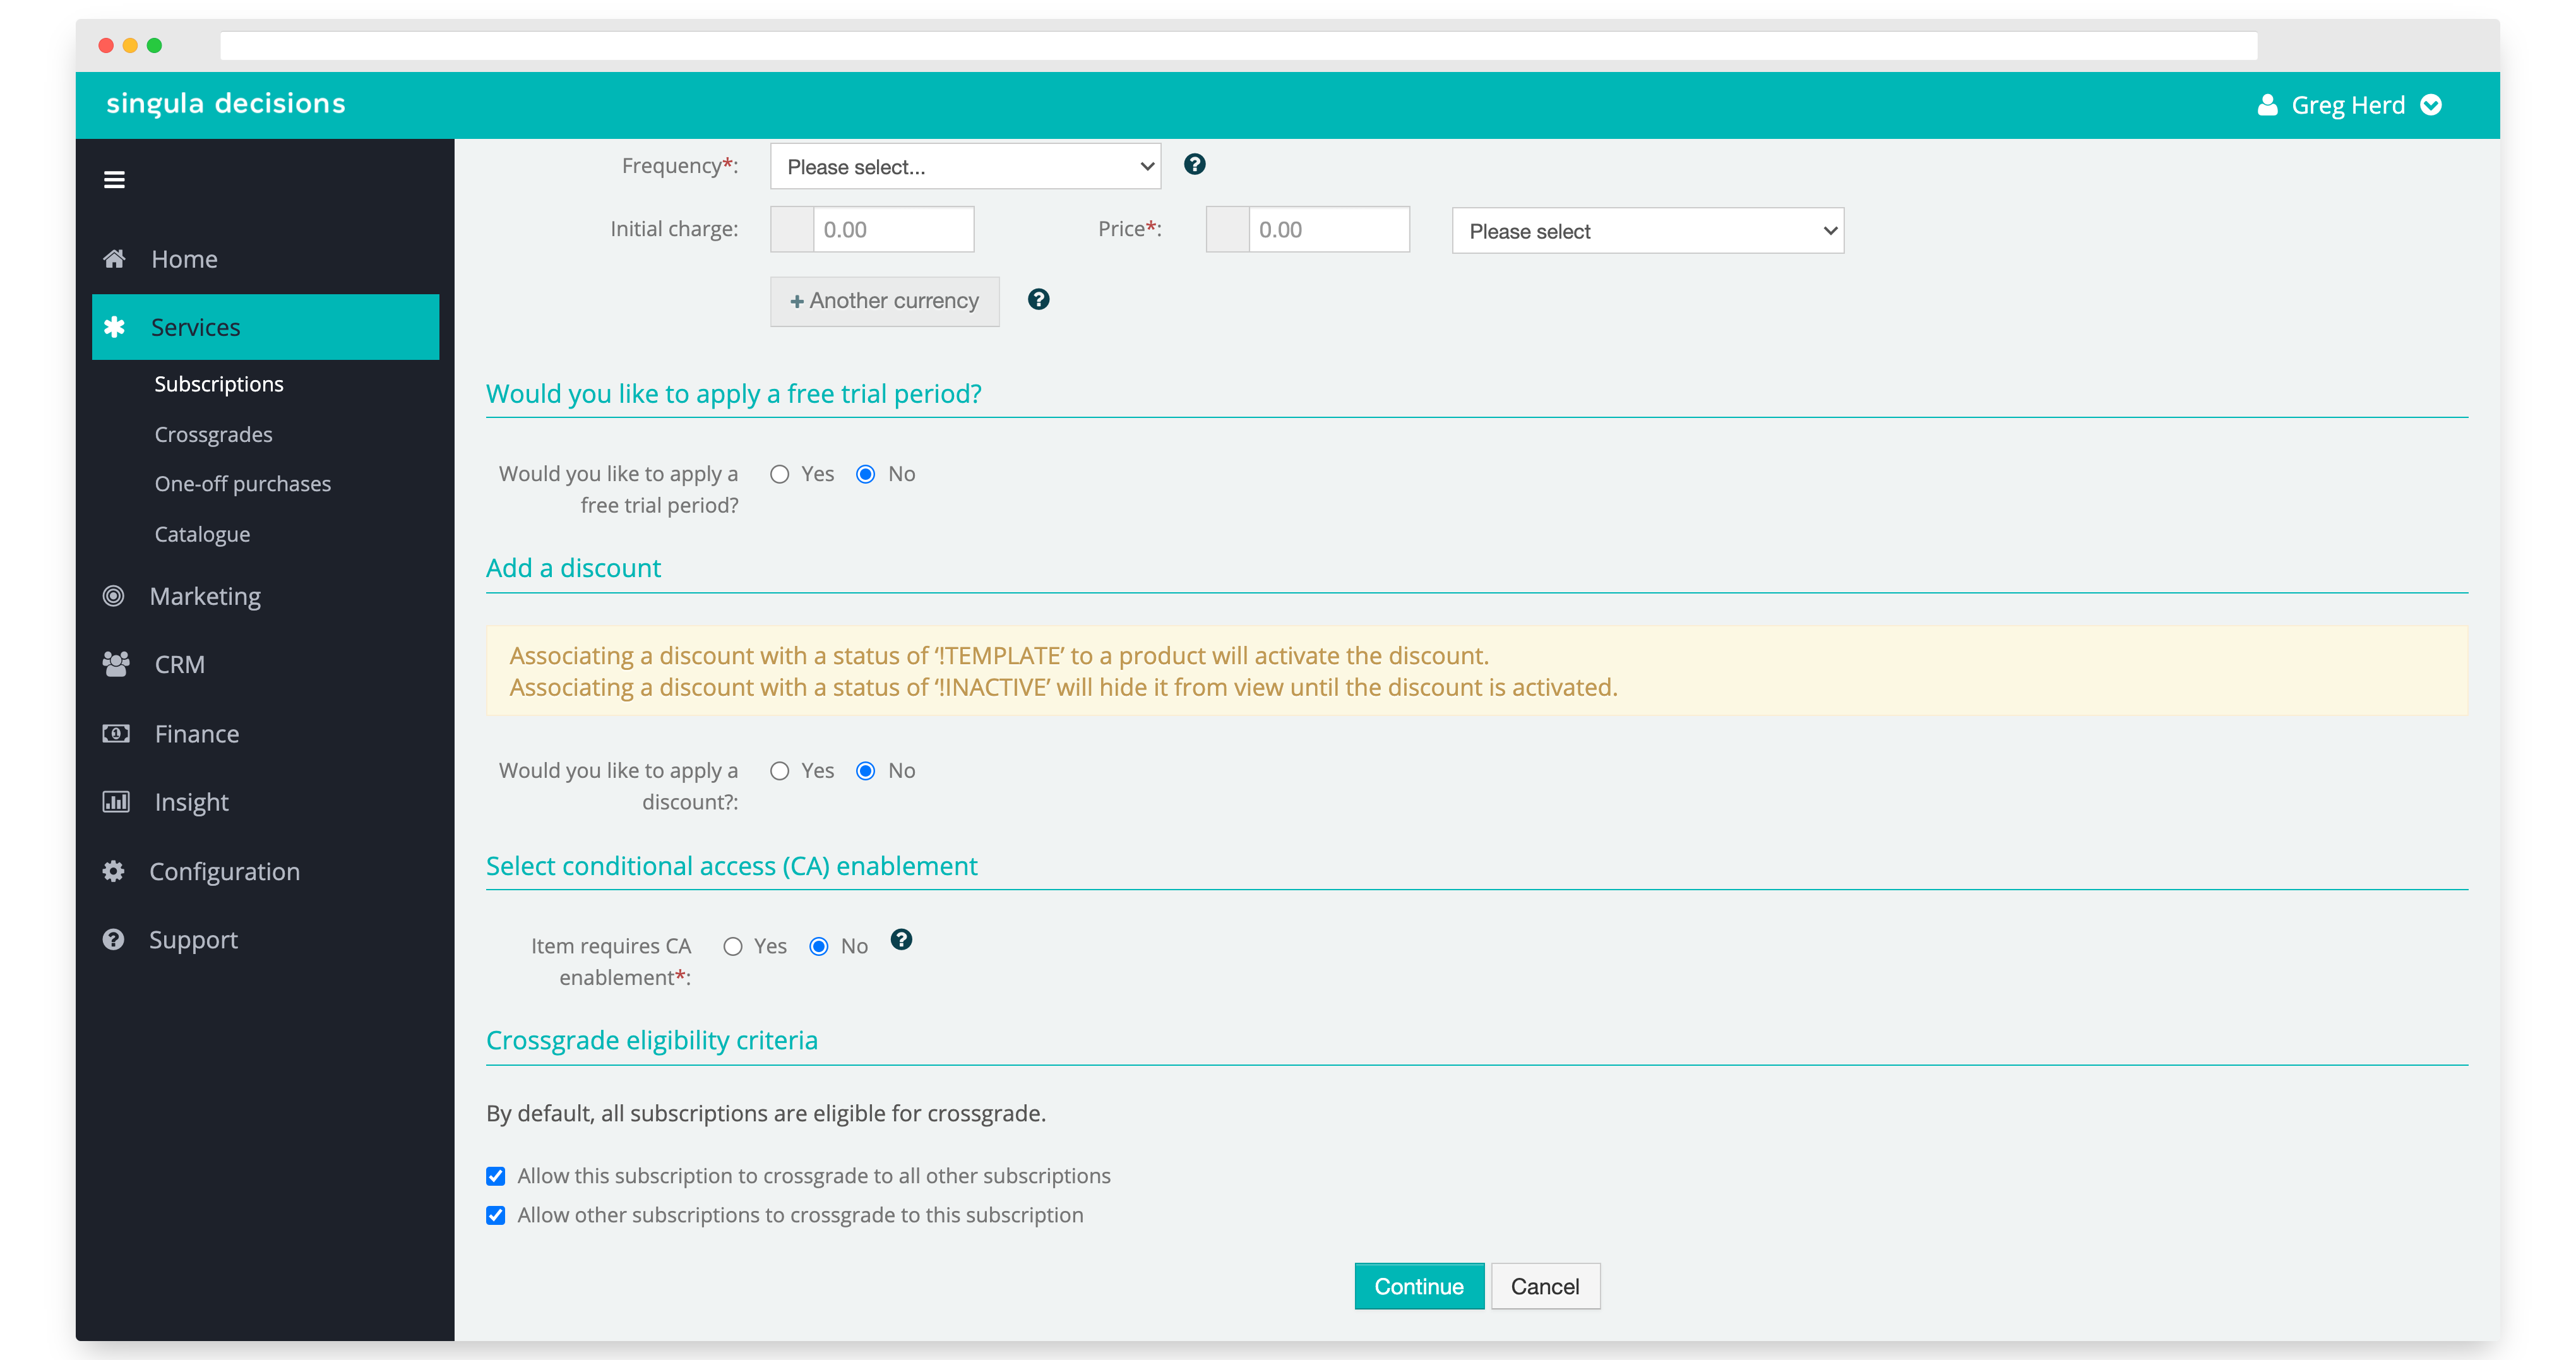
Adding a conditional access entitlements - this is optional
- Choose to add conditional access entitlements
- Enter the CA product code(s). This will be supplied by your CA provider and is required to be made available by Singula Decisions
- A summary of the selected entitlements(s) will appear. You can remove a entitlement by selecting x
Adding crossgrades
- Choose if you would like to “Allow this subscription to crossgrade to all other subscriptions” - this means a customer can move to another subscription
- Choose if you would like to “Allow other subscriptions to crossgrade to this subscription” - this means a customer can move from another subscription to this subscription
Confirm your subscription
- Select Continue to preview and review your subscription product
- Select Edit if you want to change any details
- Select when you want your subscription product to become available:
- Now - make the subscription available immediately
- Indefinite - make the subscription available on an unlimited basis
- Schedule my subscription to become available on - make the subscription available on a date and time that you choose
- Expires on - remove the subscription from sale on a date and time that you choose
- Select Confirm to save the subscription product
Change a subscription product
- Select Services
- Select Subscriptions
- Locate the subscription and select the Pen button
- Complete any changes to the subscription; any fields that are greyed out cannot be edited
You can change:
- Name
- Description
- Initial term
- Free Trial
- Discounts
- CA Enablements
- Availability (Active status)
- Select Confirm to save any changes made
Updated 6 months ago